top of page

ree

One question that I often get from friends and family members who are new to gardening is how to grow tomatoes. Over the years I have picked up many tips and tricks from my mom, who I consider a tomato growing expert. I realize it is a bit late in the season to start tomatoes, but I thought I would give some tips from planting to harvest.


  1. When picking out what types of tomatoes to plant I suggest planting a variety rather than one kind. This will give any salsas or sauces you make better flavor. This will also be beneficial if one variety gets a disease, others may be more resistant to it.

  2. Prepare your soil. Add in some compost and fertilizer. A general purpose vegetable fertilizer or a tomato specific fertilizer will both work.

  3. When you are readying to plant your tomato plants, plant deep. To do this, take the bottom (closest to the roots) one or two sets of leaves off and plant up-to the next set of leaves. By planting deep it promotes your tomato plant to develop more roots.

  4. Make sure to space your tomato plants out. Leave several feet between each plant. When I was learning to garden my mom always told me, tomatoes have a large personal space. Leaving space between each plant will allow airflow which will cut down on the possibility of fungus and will also make it easier for you to harvest with the larger space.

  5. Use a tomato cage. Tomatoes are actually vines and will grow outward on the ground otherwise. When they grow on the ground the fruit tends to rot. The cage will keep them upright off the ground preventing rotting and will make it easier to harvest.

  6. Spread either mulch or grass clipping under your plants as they grow. By doing this you are covering the soil which will prevent the soil from splashing up on the plant. Another alternative to much or grass clippings is to plant your tomatoes in landscape fabric. When soil splashes on the plant it can cause fungus which causes the oh so common early and late blight. You can also snip off the lower branches so they are not dragging on the ground which prevents blight as well.

  7. Keep a regular watering schedule. Tomatoes need a lot of water to produce fruit, but be sure not to over water either. Check the soil to see if it is moist or not before you water. This can be done by feeling it with your fingers.

  8. Watch your tomatoes grow and enjoy your harvest!

I often get asked if one can grow tomatoes in a pot. I prefer to plant them in the ground as the yield will be greater. However, not everyone has access to a raised bed or ground level garden. If you are going to plant in a pot I would recommend small to medium sized tomatoes. Cherry tomatoes do great in pots. When selecting a pot, the bigger the better. I would use no less than an 18 inch diameter pot. Also the deeper the better so your plant can develop a good root system. Fertilize your tomato plant regularly as your pot can only hold so many nutrients. Anything planted in a pot will reach a point where the nutrients are depleted in the soil and more needs to be added. Also, keep an eye on water. Tomatoes in pots will dry out much quicker!


I hope these tips are helpful to use the remainder of this gardening season and for next!


ree

ree


ree

ree


Can you tell I was having fun taking these photos? Haha

ree

Hats are one of my favorite summer accessories and something I love to collect. Not only are they fun to wear, but for me they are essential with my fair, easily burnt skin. Today I wanted to share my new favorite summer sunhat from Sarah Bray Bermuda. All winter and spring long I kept seeing these beautiful hats pop up on my Instagram feed, but they were always sold out! I finally was able to do a pre-order in May and my hat was delivered late June. I chose the wildflower hat. This hat is big and structured. The description says not for small heads and I would agree with this statement. I have a medium to large head and this hat is still plenty big! I love the size of it though because it does a great job keeping the sun off of my face, shoulders and neck. Due to this hat being structured, make sure you have a place to store it flat as it cannot be bent. I hang all of my hats on little hooks on the wall.


The ribbon was the feature that drew me to this hat. I love that you can wear this ribbon several different ways! When I am gardening I tie a big bow at the back of my head. When I am worried about wind I tie a bow under my chin. The ribbons are also replaceable, so you can match your ribbon to your outfit! I ordered the antique blue color. They also sent me a complimentary coral color ribbon which was a wonderful surprise! I have some vintage floral pattern ribbon that I plan on cutting to length which I think would look so pretty with this hat. Not only can you use ribbon with this hat, but long scarfs too!

Do you have a favorite sunhat? If so, please share!


ree

ree

There has been some major changes in my pumpkin patch since my last pumpkin update!

Last time I shared an update my vine was only a few feet long. Now it is about 20 feet long and growing pumpkins! Growing giant pumpkins are for the die hard gardeners! I have been out in my pumpkin patch daily maintaining my plants. There have been several things that I have been doing that are working well and some that did not.


Let’s start with the things that have not been working so well. First I attempted to hand pollinate my pumpkins. I would watch for a female flower to open up and pollinate it with a male flower. It seemed like whenever I did this the pumpkin would end up aborting. I decided to leave pollination to the bees and that is working just fine so far. Next, I had an infestation of cucumber beetles and squash bugs. I could not figure out why my baby pumpkins were getting holes in them. It was the cucumber beetles eating them. I sprayed the vines with eight and that took care of them. I also took precautionary measures and spread beneficial nematodes around my vines to kill any beetle larvae in the ground. So far so good! I for sure planted my plants to close together. They are growing together, but not yet choking each other out. I guess I will see what happens down the road.


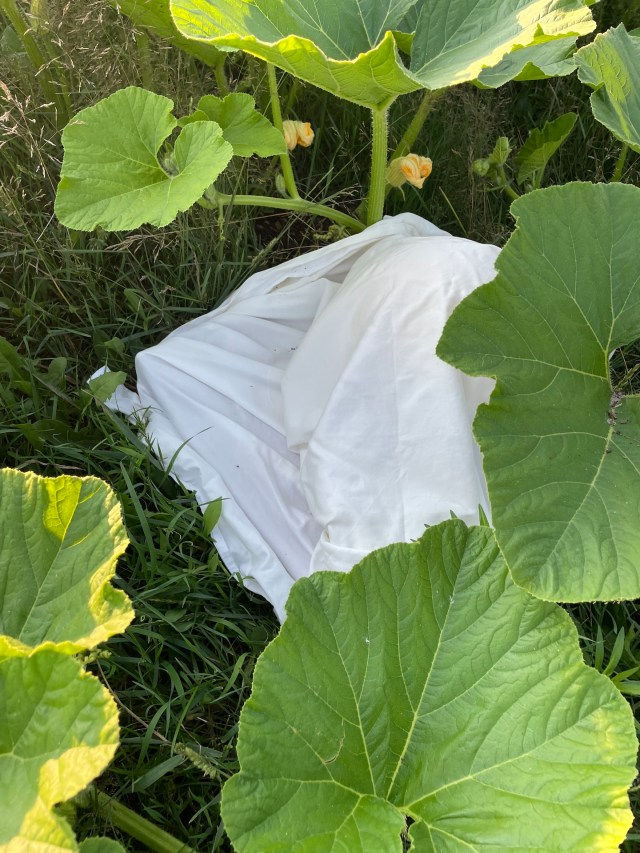
Once my pumpkins finally actually started growing pumpkins once I left the bees to pollinate I selected a few pumpkins on each plant then elevated them off the ground on foam to prevent rot. As they continue to grow I will select the best pumpkin on each plant to keep, so it has a chance to grow larger. I will need to purchase larger pieces of foam to place under them once they get larger. For fertilizing, I am watering in a fish emulsion fertilizer once per week. I also give a little bit of all purpose plant tone fertilizer once per week. I will be switching to a potassium rich fertilizer now that I have fruit. I will also be covering each pumpkin with a thin white sheet to protect the outer skin from the sun so it does not harden and prevent potential growth. Finally, I have been burying vines as they grow to protect from bugs, and promote more roots. This seems to be working good so far.


I can’t wait to share another update in another month. Hopefully I will have a giant on my hands by that time!


STAY IN THE KNOW

Thanks for submitting!

bottom of page